Note: All pages below are subject to having relevant Roles and Permissions.
Use this guide to send SMS messages or emails to Contacts or Students, Schedule a message and see an overview of sent messages.
See also: How to Create a Message Template and How to Create a Watchlist.
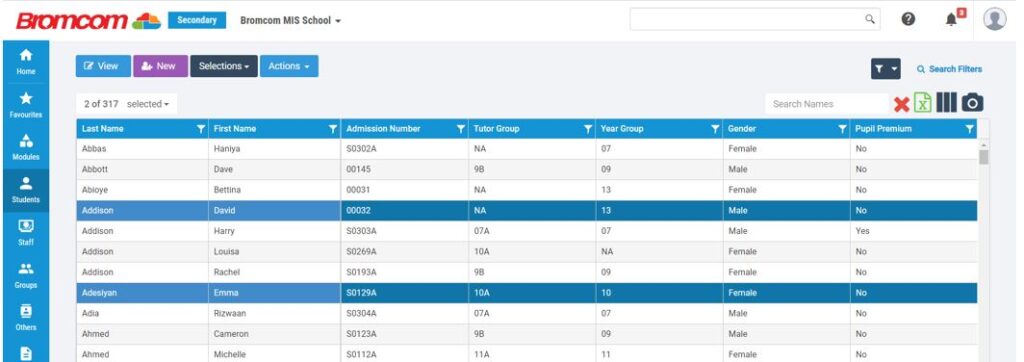
To start from the left Menu go to Students and select the relevant Student(s). In this example two students have been selected.
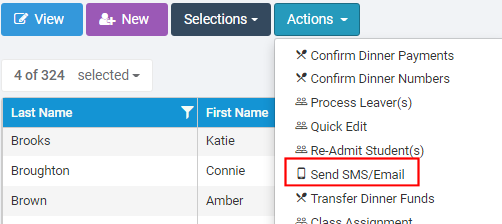
From the Actions dropdown select Send SMS/Email and this will open the Send SMS and Emails page.
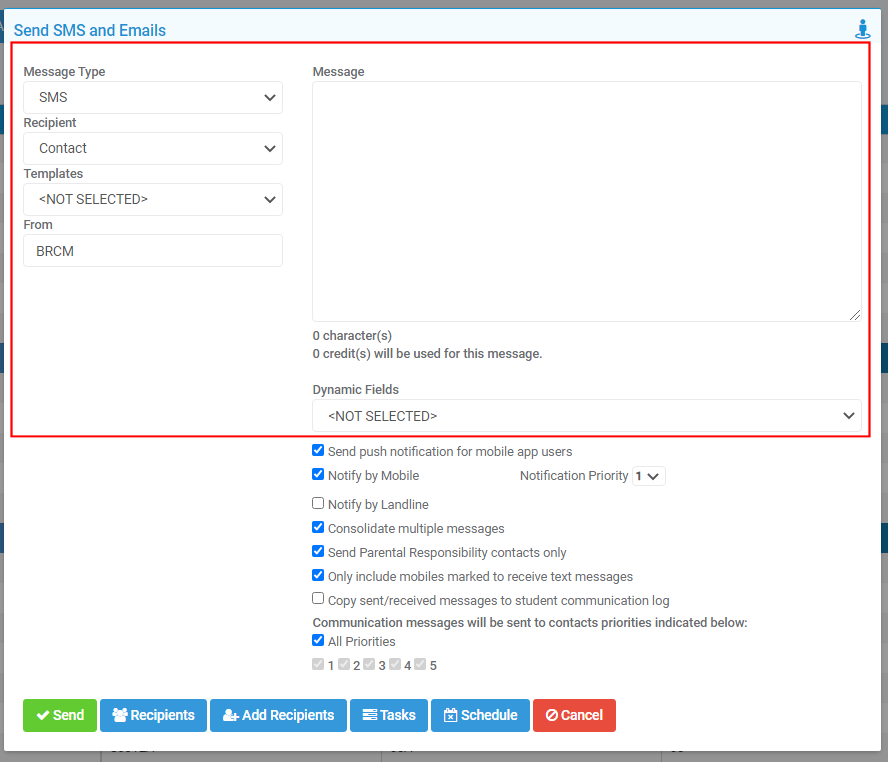
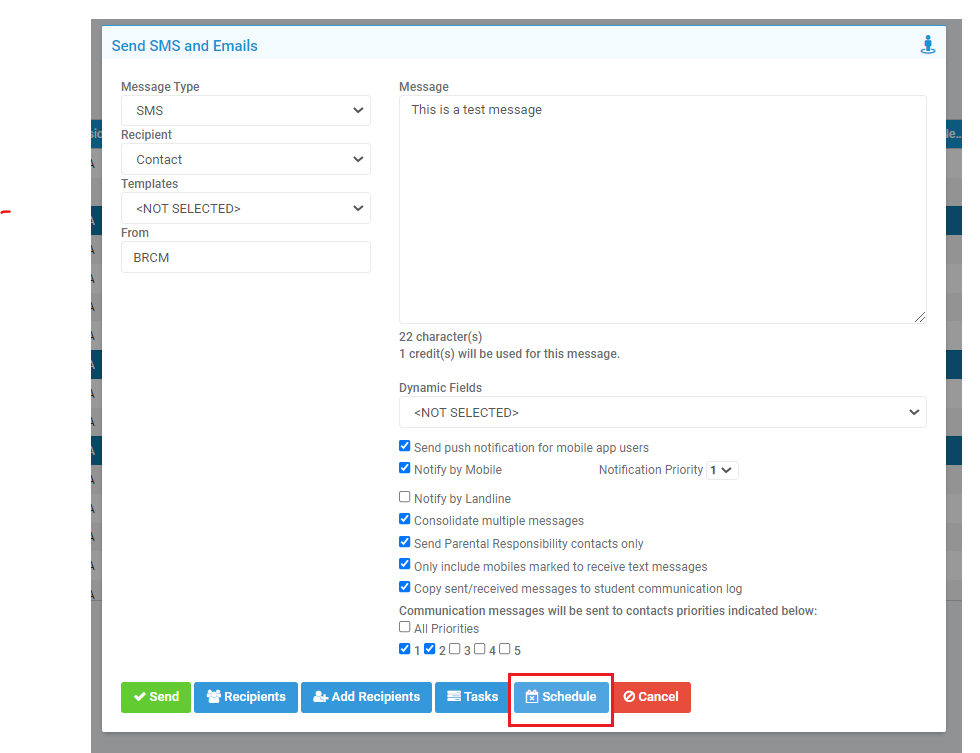
Complete the relevant information:
- Message Type – select SMS (for this example)
- Recipient – select Contact or Student
- Templates – if a message Template has been created in advance select the relevant template from the dropdown list. A preview of the template will appear in the Message Box
- Message – type the message
- Dynamic Fields – select the relevant fields to personalise the message
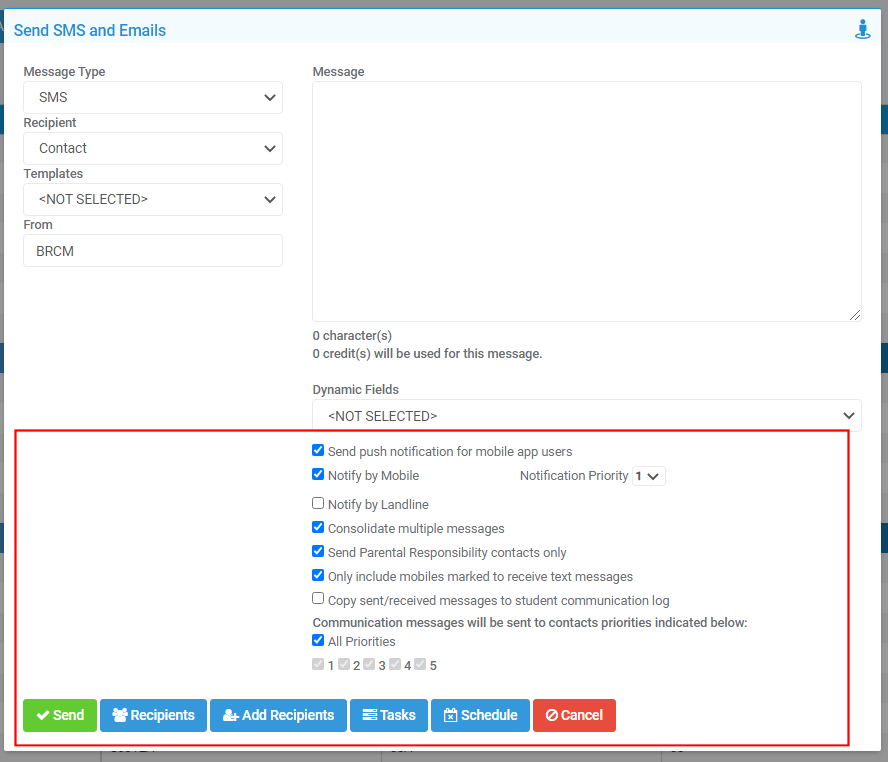
Check the Tick boxes as required. In this example the Notify by Mobile option has been selected and messages have been sent to Notification Priority 1 only. The priority refers to the defined priority in the Contacts Information under Phone & Email

Note: Consolidate Multiple Message enables 1 message to go to a Contact who has several children in school.
All Priorities is ticked by default, untick and select the required Priorities if required. For example untick and select 1 and 2 for the message to be sent to Priorities 1 & 2.
Click the Recipients button to check who will be sent the SMS before you send.

Tick or Untick as require or go back and update the information from the Student Contacts if you think it is incorrect.
When complete, click the Send button.
The Send SMS/Email option can also be used to send Messages to both Staff and Groups by selecting the option from the Actions button whilst on the Staff or Groups pages.
If messages fail due to a lack of credit, you will need to re-run the process. There is currently no Resend option.
To Schedule a message click on Schedule on the Send SMS and Emails page.
To see previously Scheduled Messages click on Tasks.
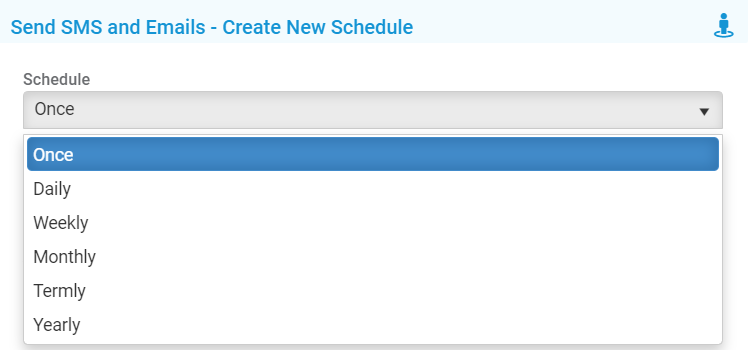
From the Schedule dropdown choose either Once, Daily, Weekly, Monthly, Termly or Yearly.
Then complete the dropdown choices dependant on the Schedule choice.
In this example a Weekly Schedule in chosen on Academic Weeks Only, Every Monday at 10:40. Click Save.

In this example a Monthly Schedule in chosen on the First Monday at 10:40. Click Save.

To see Sent Messages go to Modules > Communications > Overview

In this example a Push Notification has been sent.
Click on the number on Sent Today to see the message(s).
